Summary
In normal live streaming (live streaming not using Local Mode), the connection between Dashboard and LiveShell X is mandatory, and live streaming is not possible in situations where the Dashboard server and LiveShell X cannot communicate.
Therefore, in a local environment with no Internet connection, LiveShell X cannot communicate with the Dashboard server, so live streaming is not possible.
In contrast, Local Mode is a mode in which LiveShell X does not need to connect to Dashboard. Since LiveShell X does not connect to Dashboard, LiveShell X is not required to be connected to the Internet.
As a result, even if you do not have an Internet connection, you can still live stream with LiveShell X by setting up a live streaming server on your local network.
As Local Mode is a live streaming mode that does not communicate with Dashboard but also does not disconnect any other Internet connection, it is possible to stream to YouTube Live or other live streaming platforms in Local Mode.
If for some reason you are unable to connect to Dashboard and therefore cannot live stream, you can use Local Mode to live stream to YouTube Live or other live streaming services.
Main Use Cases
Live streaming on a local network environment with no Internet connection.
Omitting connection to Dashboard when live streaming is not possible due to being unable to connect to Dashboard.
How to Set Local Mode
There are three ways to set Local Mode.
1.Via Dashboard
2.Configuration via Cerevo website
3.Setup via the main unit
How to Setup via Dashboard
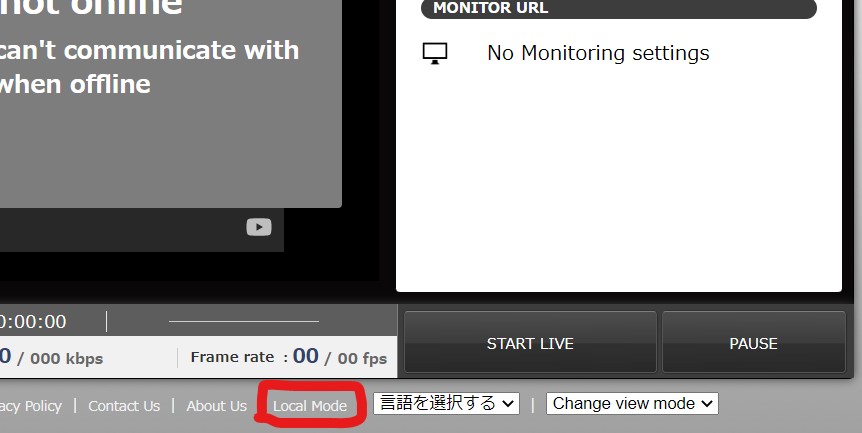
1. Access http://shell.cerevo.com/login. Local Mode does not use the Dashboard function, so login is not required.
2. Click on [Local Mode] in the footer to open the Local Mode settings page.
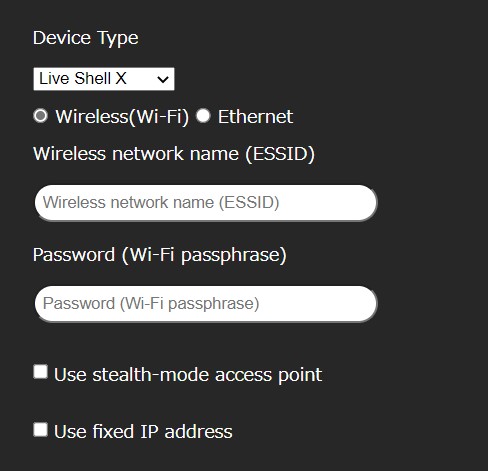
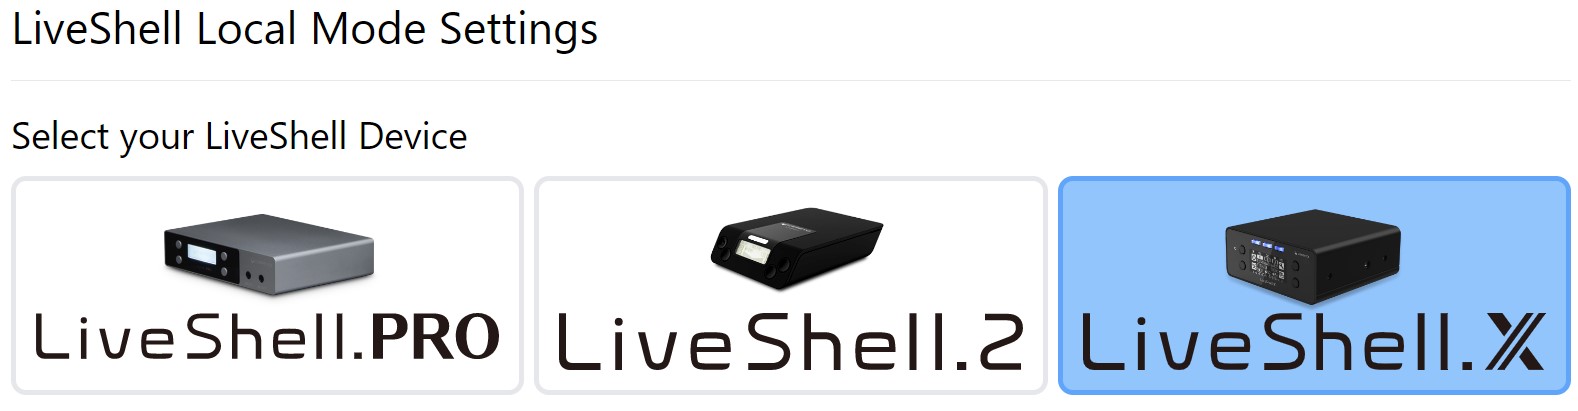
3. Select [LiveShell X] from [Device Type].
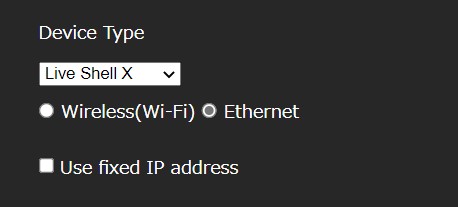
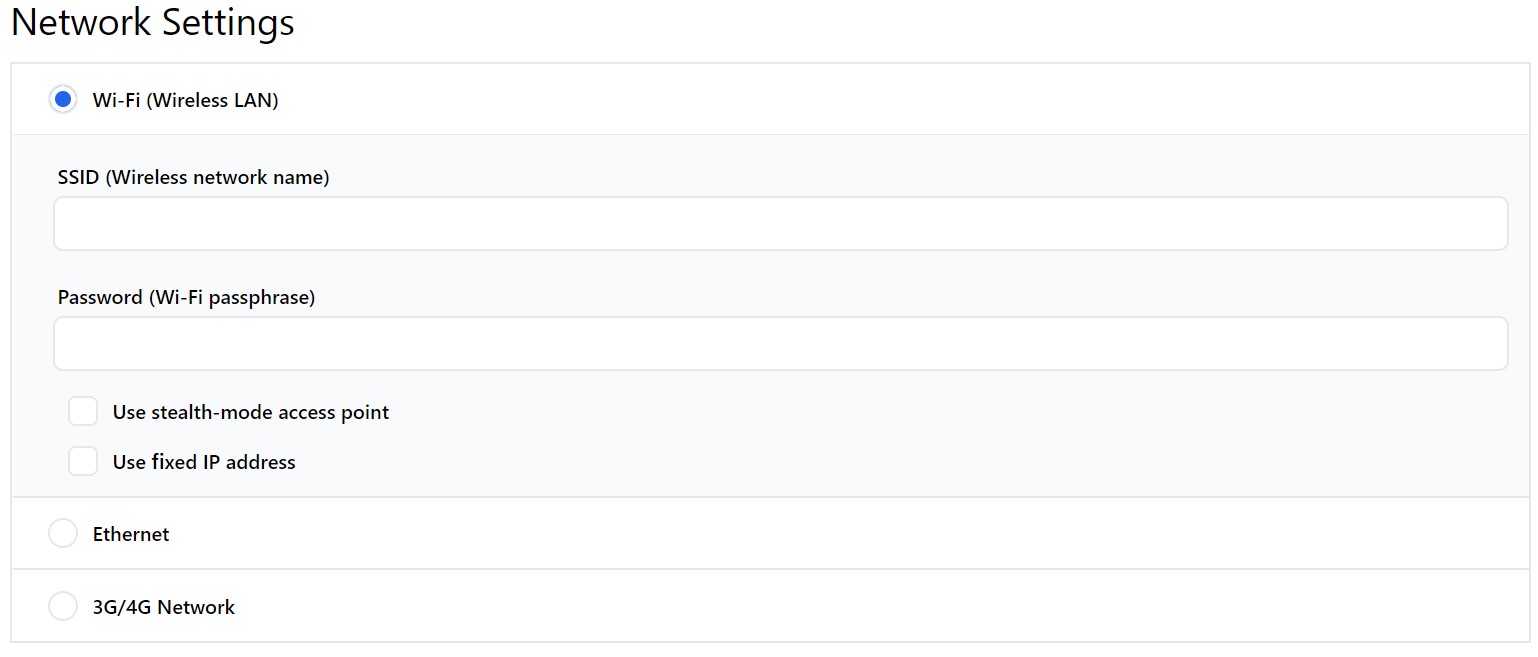
4. Select the connection type – Wireless LAN (Wi-Fi), Ethernet, etc., according to the network connection of your LiveShell X.
5. Please enter the necessary information according to each network connection environment. If you are using a fixed IP for wireless LAN (Wi-Fi) or Ethernet, check the “Use fixed IP” checkbox to display the entry field.
[Wireless LAN (Wi-Fi)]
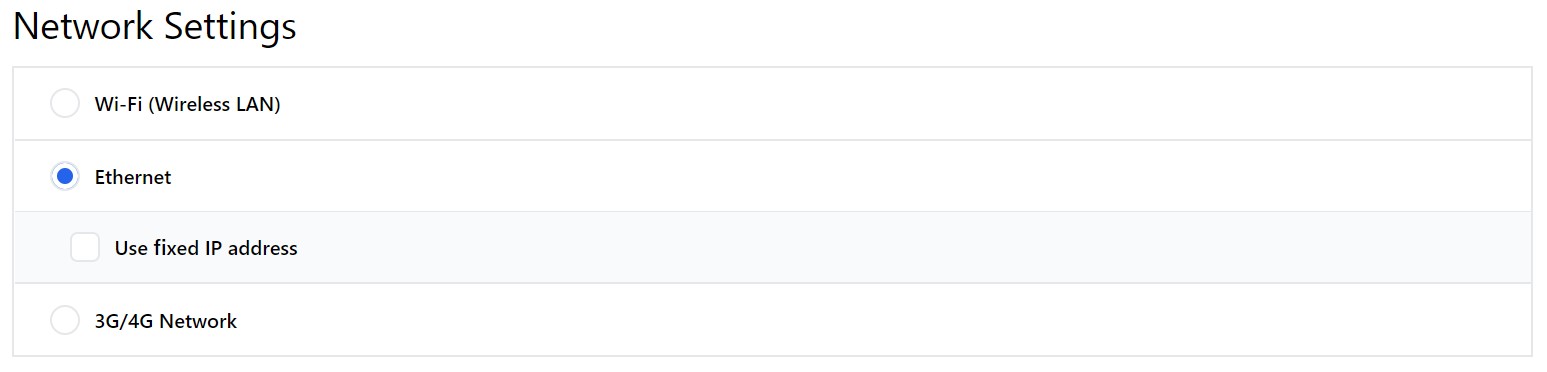
[Wired LAN]
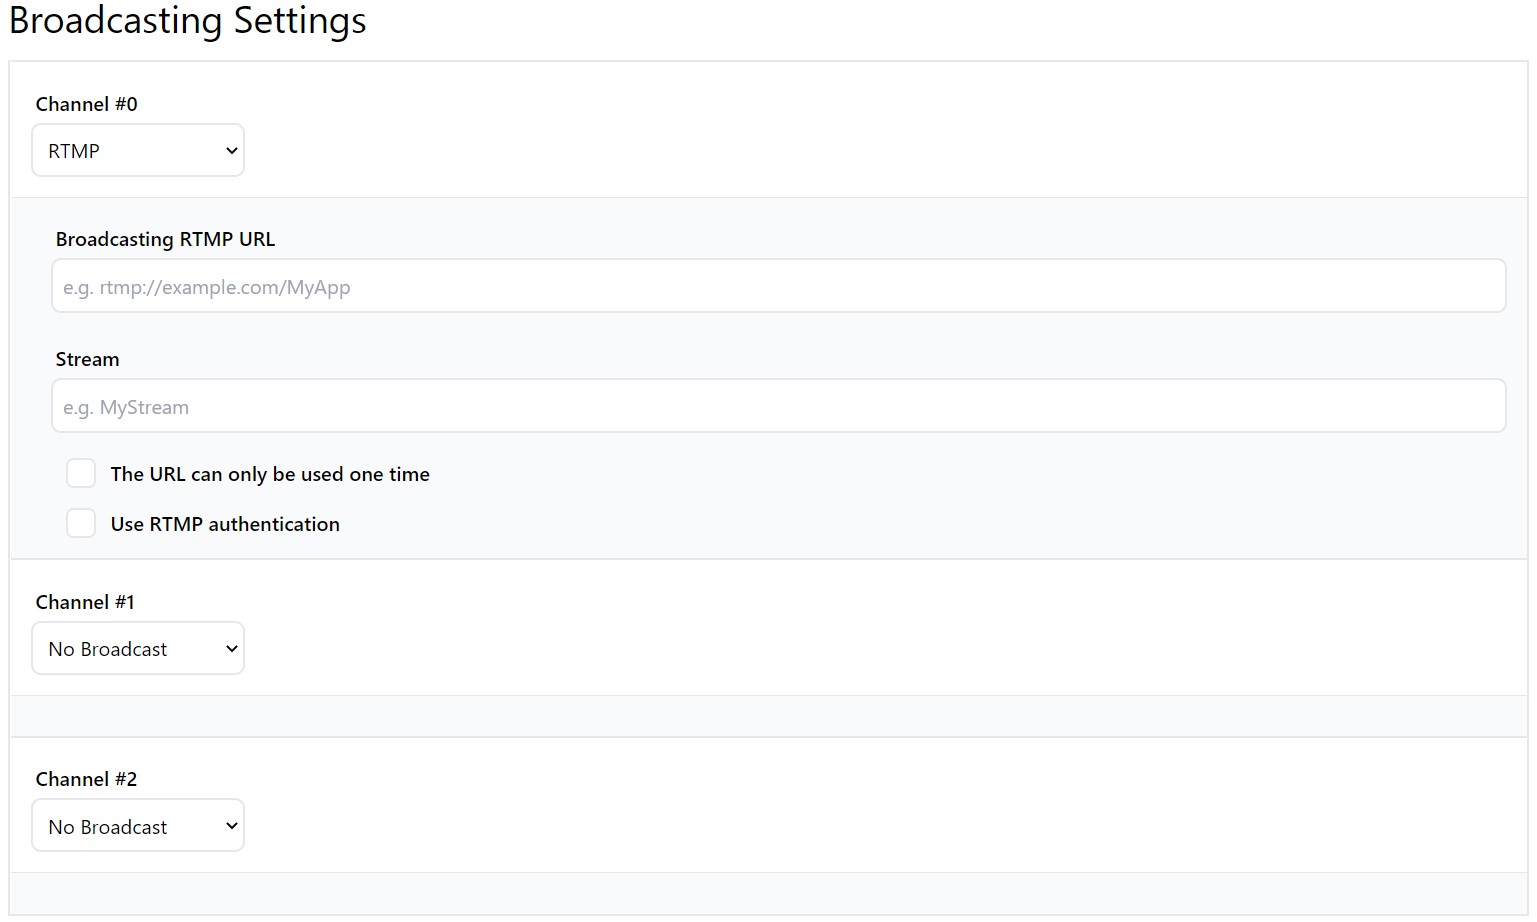
6. Select the channel you wish to stream to.
7. Select “RTMP”, “RTSP”, “Recording”, “MPEG-TS/UDP” or “No Live Settings” and enter the necessary settings.
8. Press the [OK] button.
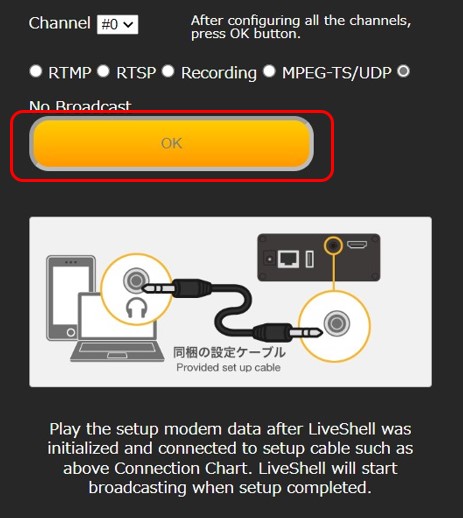
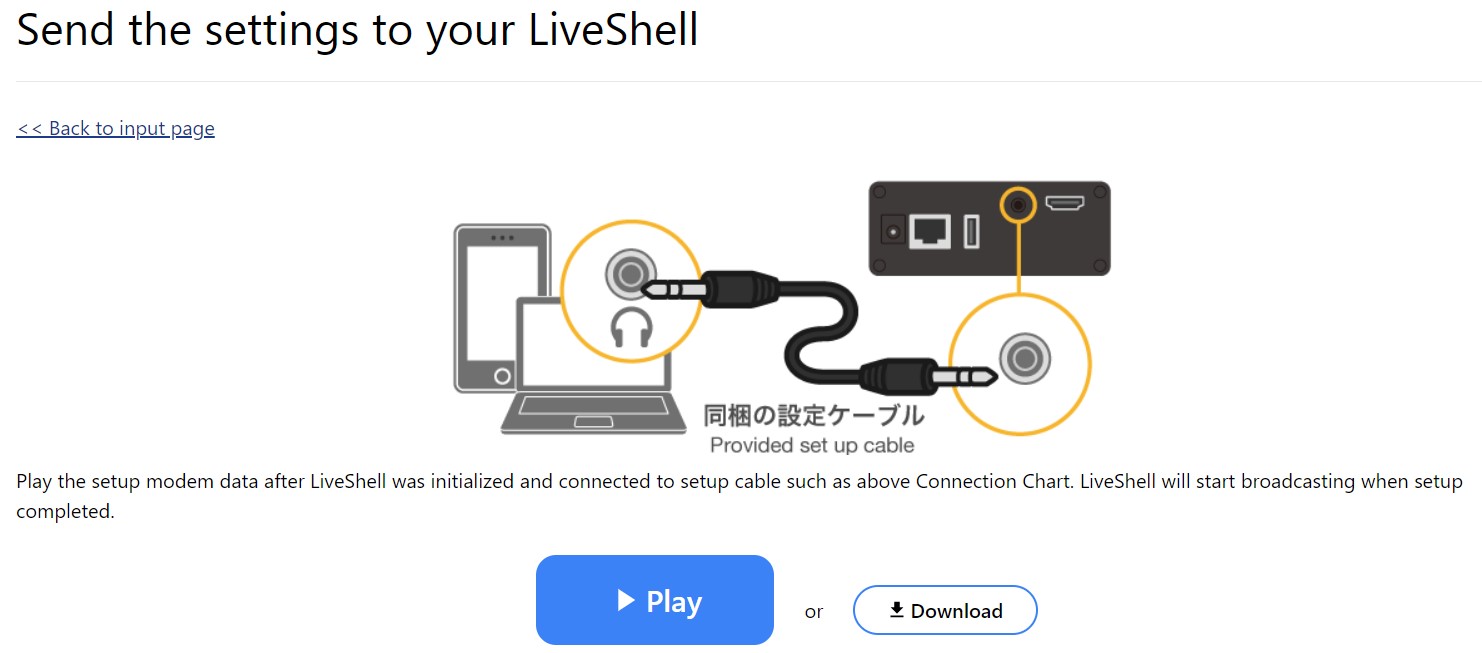
9. When the playback button for transferring setup information appears, connect the included set up cable as shown in the illustration from your PC to the LINE-IN of LiveShell X, and press the play button. When the setup data is successfully sent to LiveShell X, the LiveShell X device screen will show the new settings automatically.
*If a problem occurs, please check if the audio volume of your PC or other device is appropriate (maximum volume is recommended).
10. When setup has successfully completed, live streaming will start if you selected RTMP server or recording. If you selected RTSP server, LiveShell X will wait for a connection from the client application. If you go offline when in Local Mode, [Local Mode] will be displayed on the LiveShell X device screen.
How to Setup via the Cerevo Website
1. Go to https://ls-local.cerevo.com/
2. Under [Select the LiveShell device to use], select [LiveShell X].
3. Select the connection type such as wireless LAN (Wi-Fi), wired LAN, 3G/4G network, etc. according to the network connection environment of your LiveShell X.
4. If you use a fixed IP for wireless LAN (Wi-Fi) or wired LAN, select [Use fixed IP] to display the input field.
Wireless LAN (Wi-Fi)
Wired LAN/Ethernet
5. Select the channel you wish to stream to.
6. Select [RTMP], [RTSP Server Mode], [Recording], [MPEG-TS/UDP] or [No Distribution Settings] and enter the necessary settings.
7. Click the [Next] button.
8. When the playback button for transferring setup information appears, connect the included set up cable as shown in the illustration from your PC to the LINE-IN of LiveShell X, and press the play button. When the setup data is successfully sent to LiveShell X, the LiveShell X device screen will show the new settings automatically.
*If a problem occurs, please check if the audio volume of your PC or other device is appropriate (maximum volume is recommended).
9. When setup has successfully completed, live streaming will start if you selected RTMP server or recording. If you selected RTSP server, LiveShell X will wait for a connection from the client application. If you go offline when in local mode, [Local Mode] will be displayed on the LiveShell X device screen.
How to Setup via the Main Unit
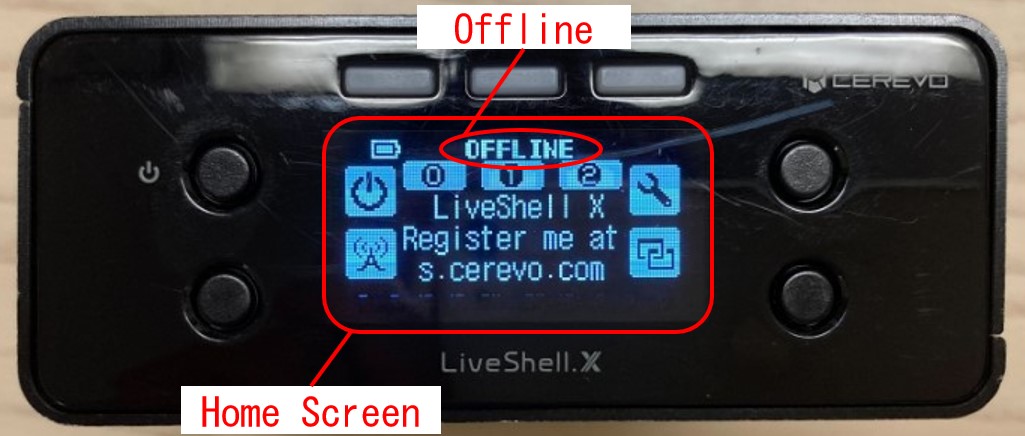
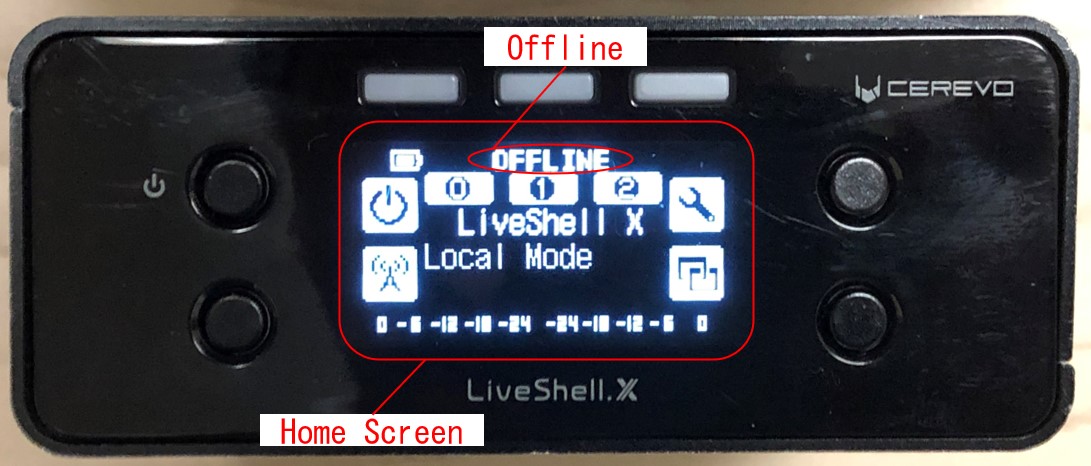
1. Make sure LiveShell X is OFFLINE and the Home screen is displayed on the OLED.
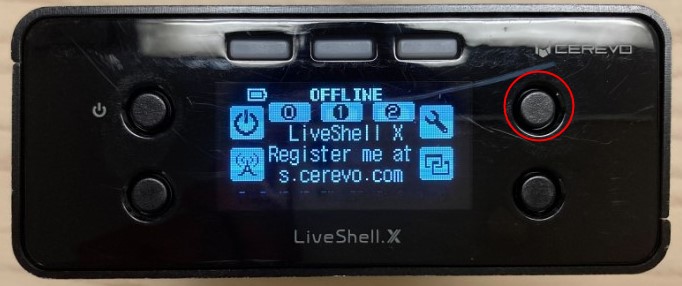
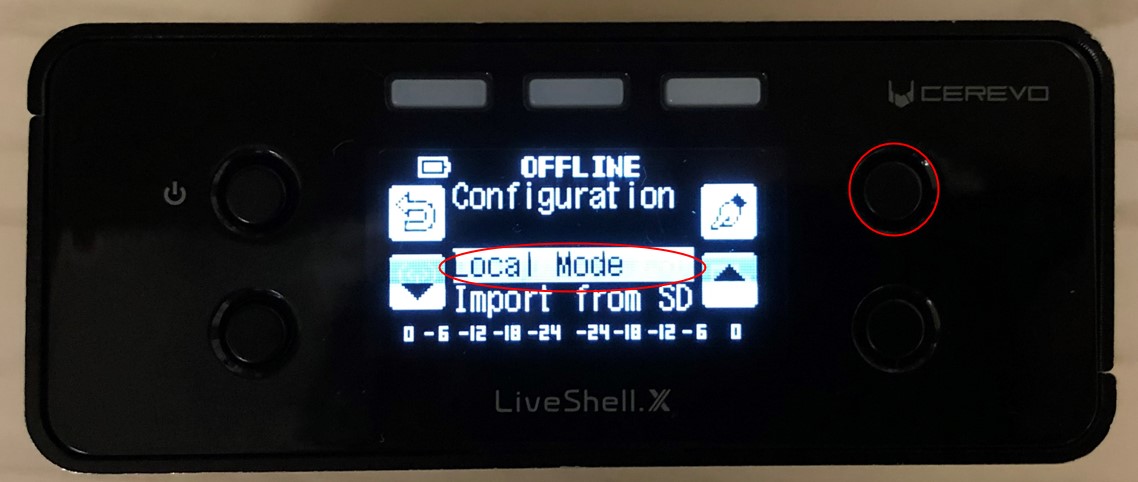
2. Push the upper right corner button and go to the settings menu. “Configuration” will appear if you are in the settings menu.
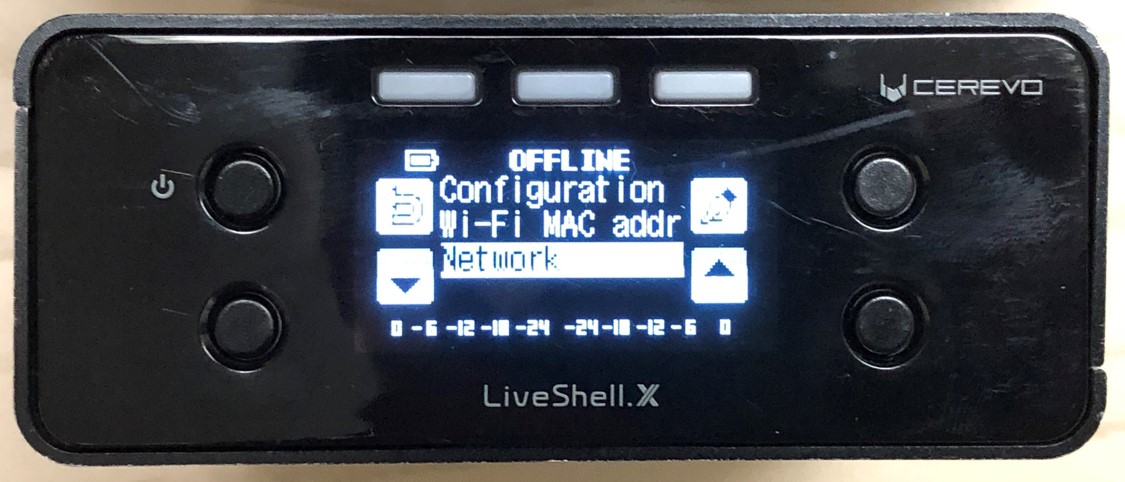
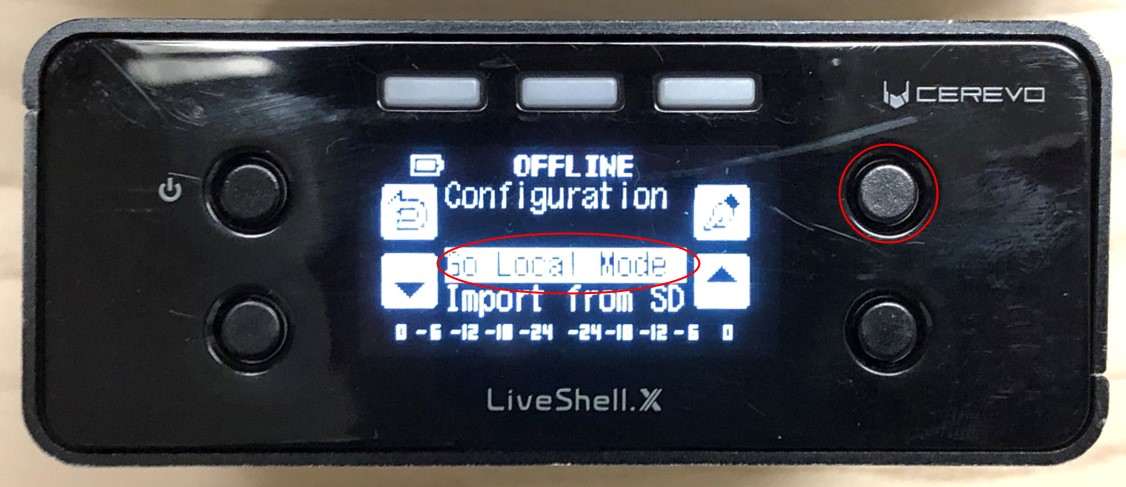
3. Move the cursor (▲ and ▼) by pushing the lower left or lower right button to select “Local Mode”, then press the upper right button to confirm.
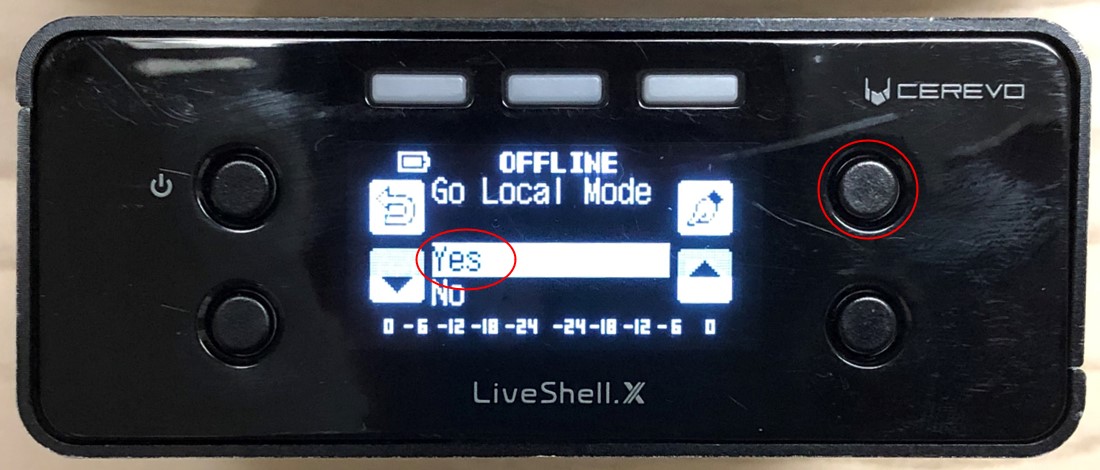
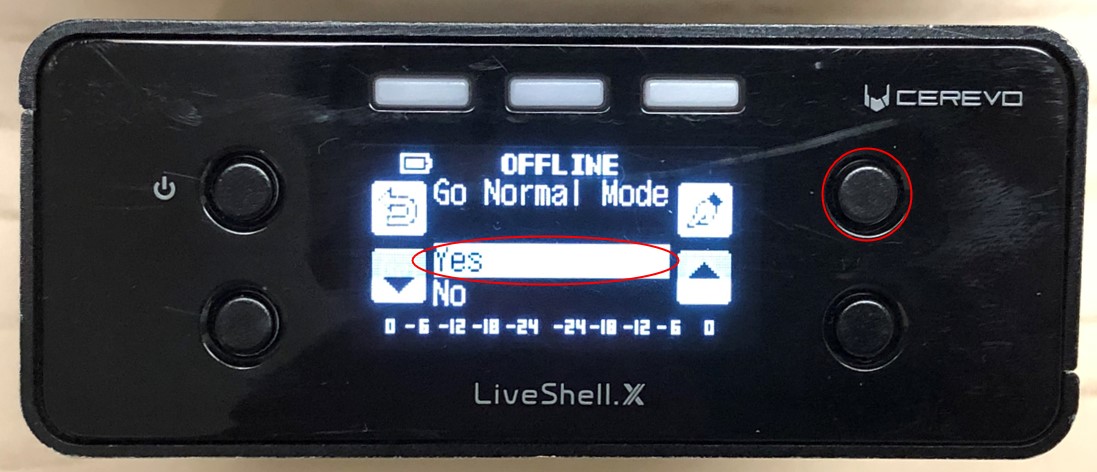
4. Move the cursor (▲ and ▼) by pushing the lower left or lower right button to select “Yes”, and press the upper right button to confirm.
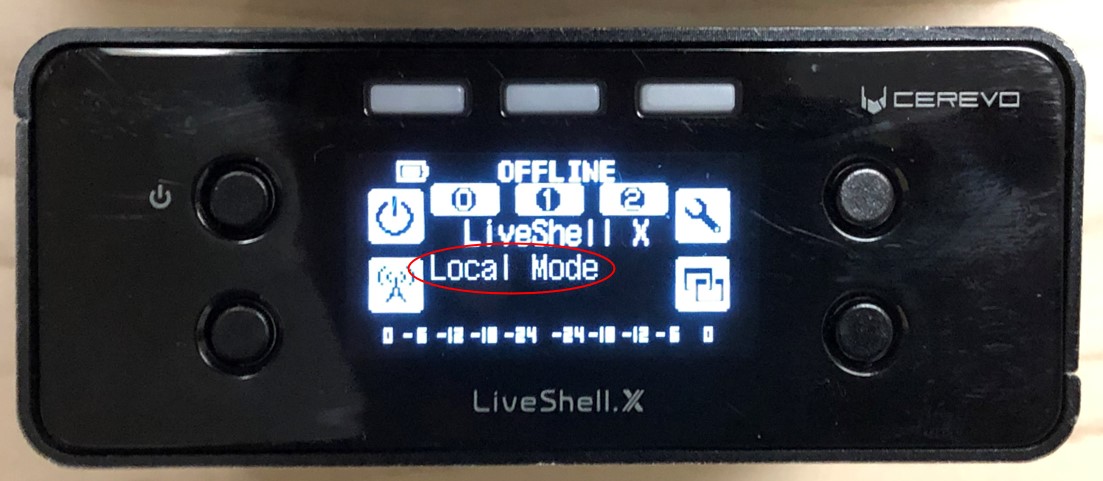
5. “Local Mode” will be displayed on the HOME screen when LiveShell X successfully switched to Local Mode.
To Disconnect Local Mode
1. Make sure LiveShell X is OFFLINE and the Home screen is displayed on the OLED.
2. Push the upper right corner button and go to the settings menu. “Configuration” will appear if you are in the settings menu.

3. Move the cursor (▲ and ▼) by pushing the lower left or lower right button to select “Local Mode”, then press the upper right button to confirm.
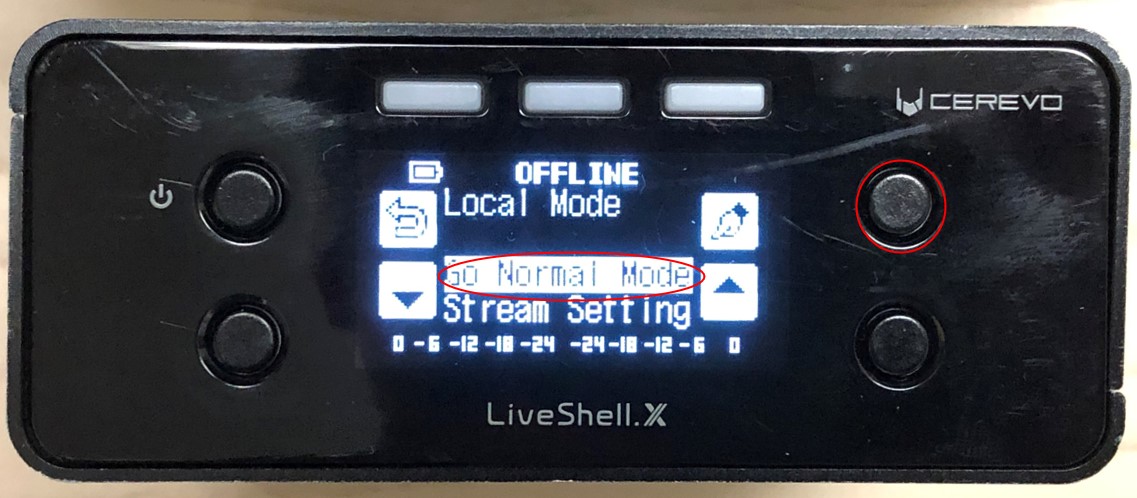
4. Move the cursor (▲ and ▼) to “Normal Mode” and press the upper right button to confirm.
5. Move the cursor (▲ and ▼) to “Yes” by pushing the lower left or lower right button, and press the upper right button to confirm.
Loal Mode Disadvantage
Local Mode does not support Dashboard because it disables LiveShell X and Dashboard from communicating.
Greater functionality is available via TinyCon, but there are some functions that can only be performed via Dashboard and not via TinyCon (for example, the ticker function cannot be used via TinyCon).
