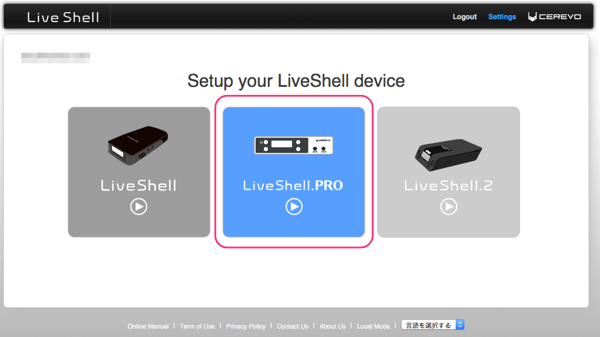
Thank you for purchasing the Cerevo LiveShell PRO.
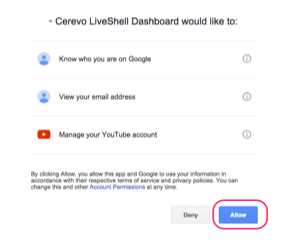
See this page for ongoing issues with Google account
Please be sure to read these instructions thoroughly and keep them where they will be read by all who use the product.
Thank you for purchasing the Cerevo LiveShell PRO.
See this page for ongoing issues with Google account
Please be sure to read these instructions thoroughly and keep them where they will be read by all who use the product.
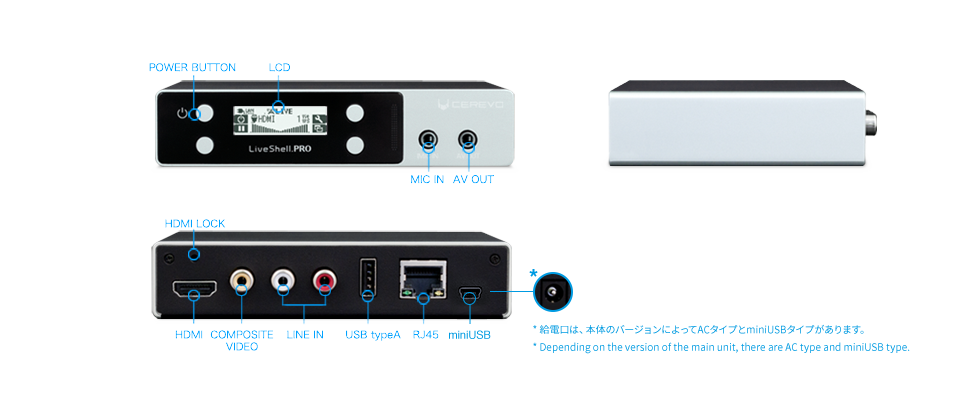
Your LiveShell PRO box contains these items:
To start live streaming with your LiveShell PRO, you will need:
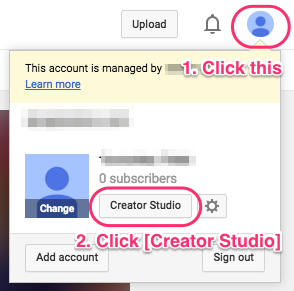
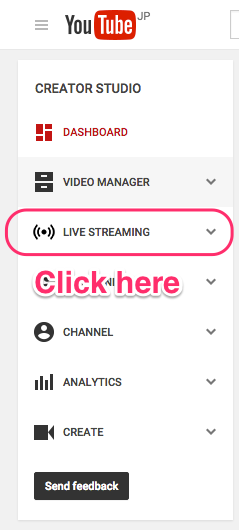
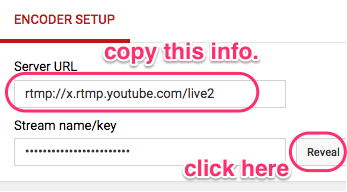
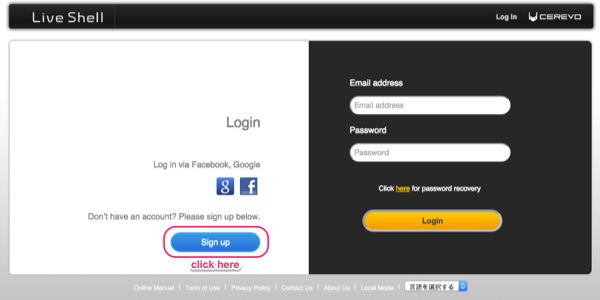
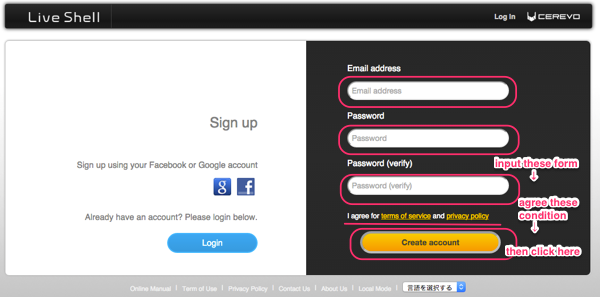
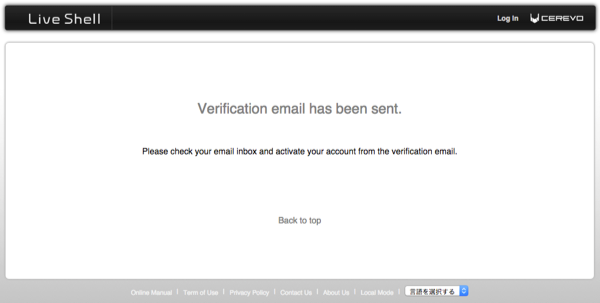
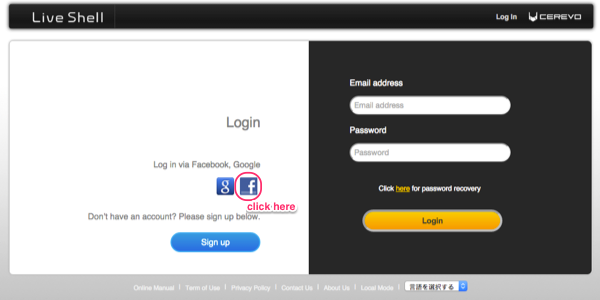
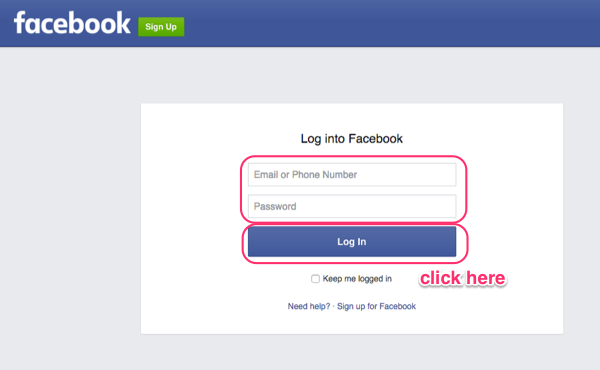
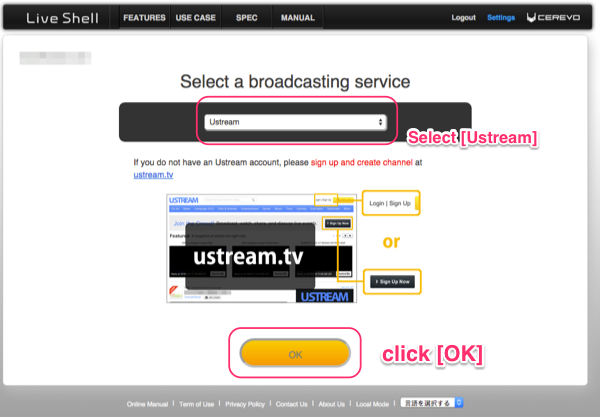
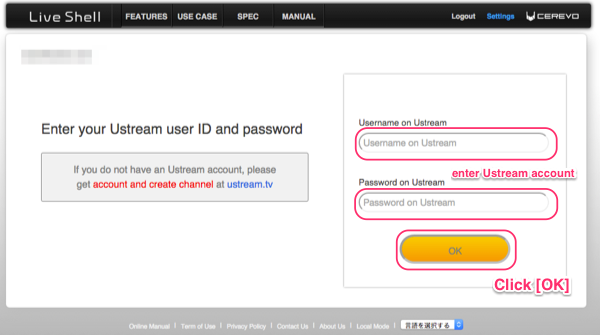
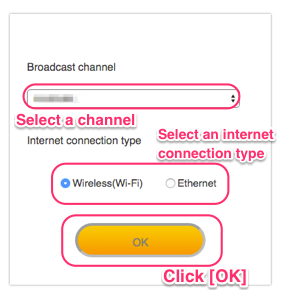
Dashboard is a web-based control panel to control your live streaming. To control your LiveShell PRO broadcasting a Dashboard account is required. To broadcasting using YouTube Live you will also require a Google authenticated account.


Make sure you need to prepare user registration on Ustream and creating channel to proceed these steps.
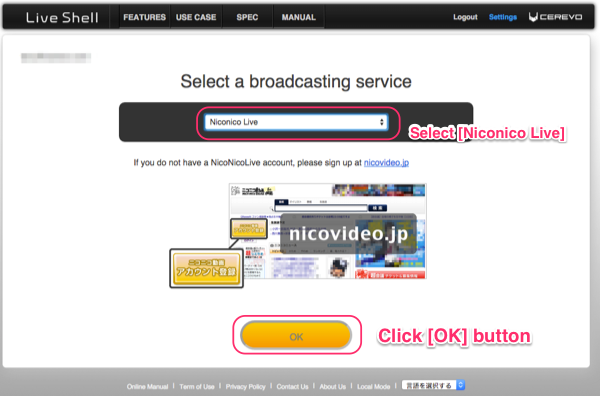
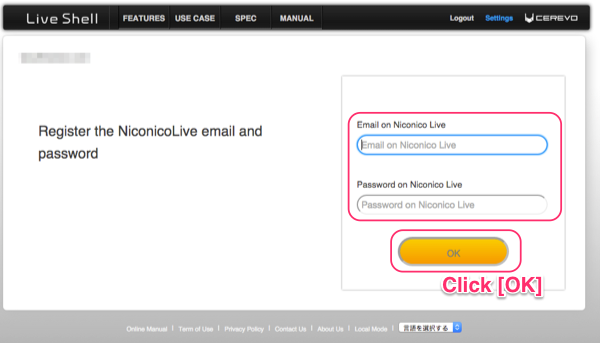
Make sure you need to prepare user registration(Niconico Live is available only for paid account) on niconico to proceed these steps.

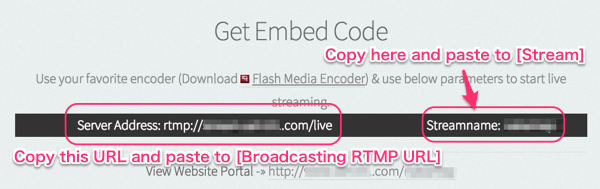
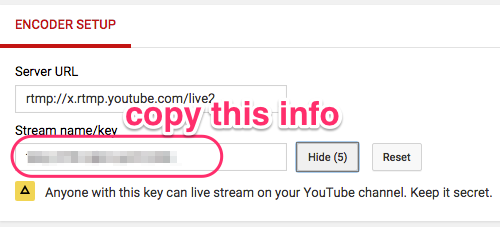
Make sure you need to prepare RTMP server address(URL) and other informations your RTMP server required to proceed these steps.
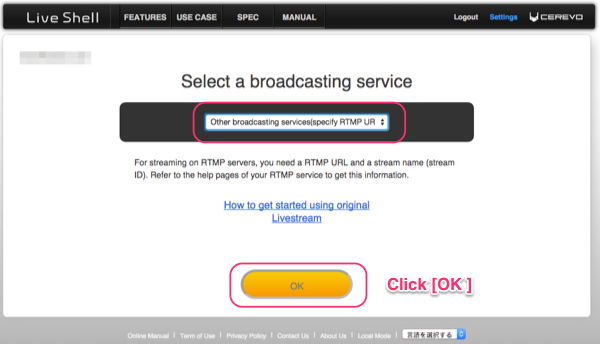
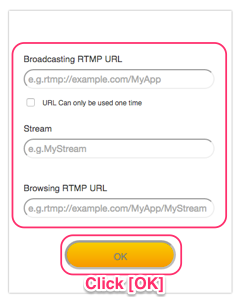
If you would like to broadcast from your favorite RTMP streaming service not list in LiveShell Dashboard, see settings or encoder setting section and these information.
Here is a sample web information for setting as [Other broadcasting services]