To start YouTube Live with LiveShell PRO
You need to create YouTube(Google) account and a lot of confirmation in YouTube web site.
Make sure you can live stream in YouTube without LiveShell PRO.And then follow these steps.
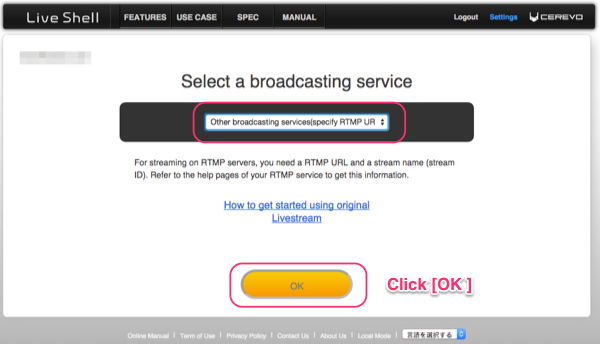
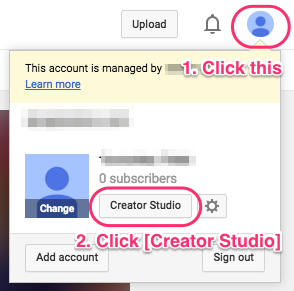
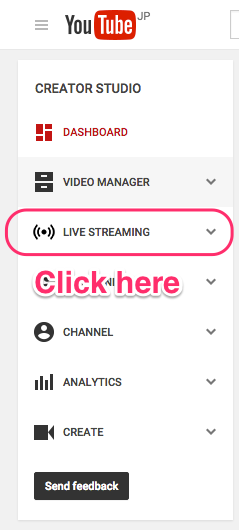
And also there are two feature in YouTube live.[Stream now(Beta)] and [Events] (as of Mar. 2016).[YouTube Live] preset menu in Dashboard is for [Events].If you would like to use [Stream now(Beta)], you need to select [Other broadcasting services] and enter information.You may find that information at [CREATOR STUDIO] > [Stream now] in YouTube.See section 2-1c. in detail
Preparing for YouTube Live
- Phone number not verified other YouTube accounts twice or more within a year.
- Create your channel and then need to verify your account
- Confirm that your channel in good standing(*)
*See [Keep your YouTube account in good standing] for more information(external web page).
Note : If you need more detailed information, please visit YouTube help forum(external web page)
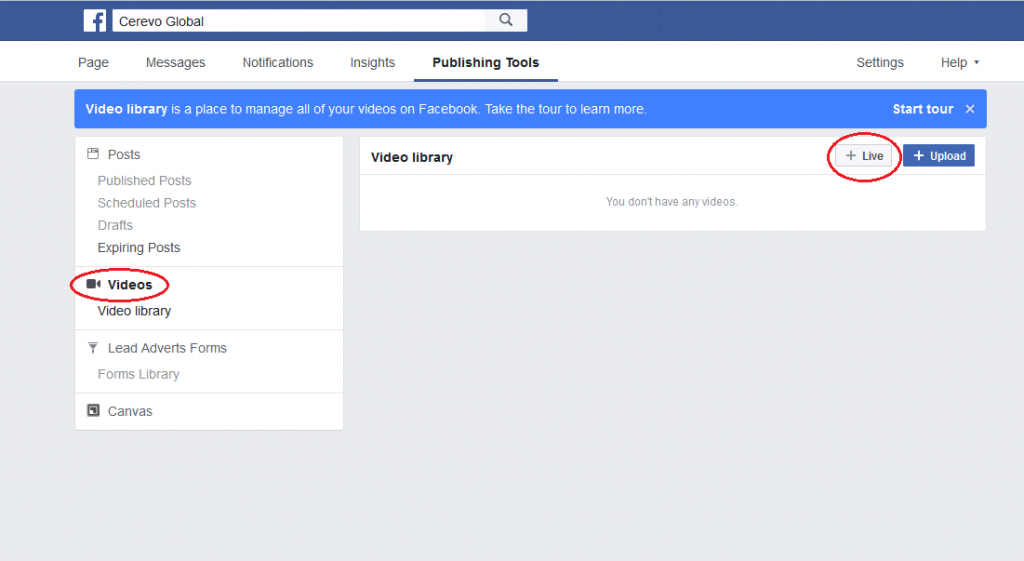
Setup steps
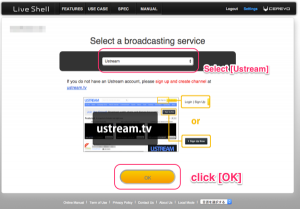
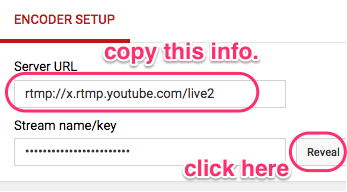
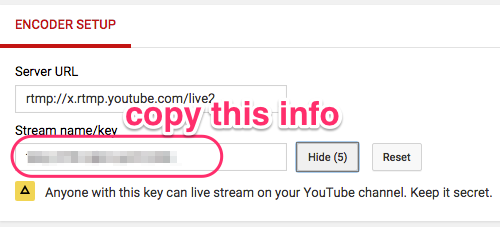
- Access to http://shell.cerevo.com/login and sign in Dashboard.
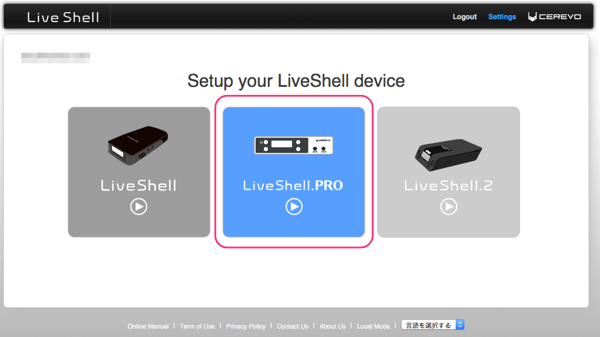
- Select “LiveShell PRO”.

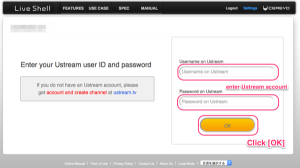
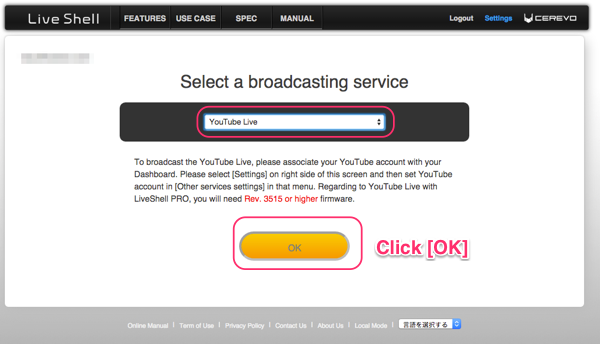
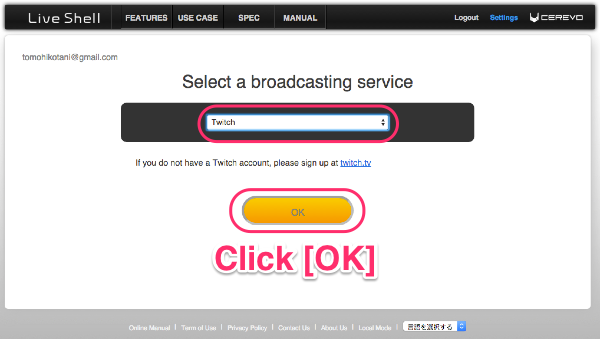
- Select [YouTube Live] and click [OK] button.

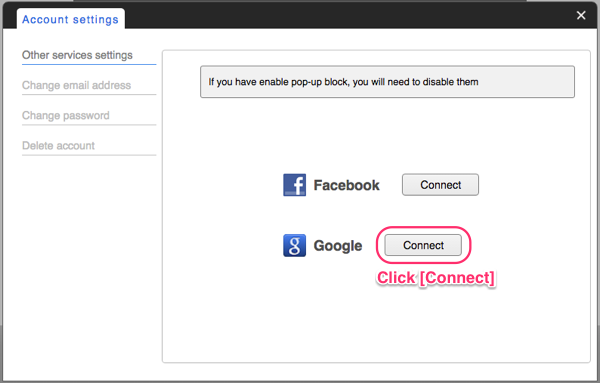
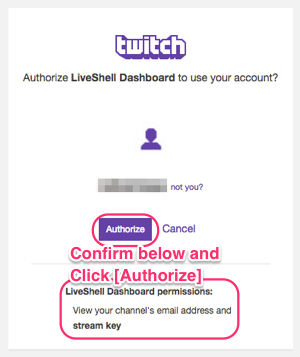
- If you login Dashboard as Cerevo account or Facebook authenticated account that doesn’t coordinate with Google account,you see account setting dialog window.Press [Connect] button and proceed google authentication.After that re-select [YouTube Live] and click [OK] button.

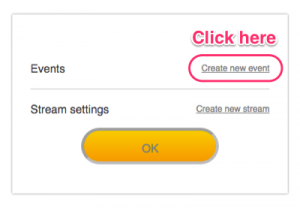
- Next, you will set event schedule and stream resolution.Click [Create new event] and enter event information.
- And you can set these basic items from Dashboard.Advanced settings can be set in [Events] page (in YouTube).Also you need to set current time or later into event [start time].
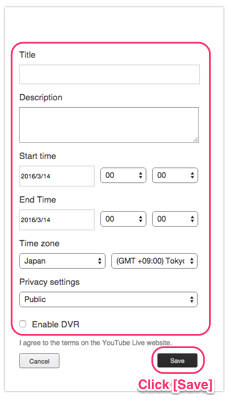
- In Privacy settings section, you can set [Public], [Unlisted] and [Private].
- Public:
The streaming is public and anybody can search and watch.
- Unlisted:
The streaming is public but not listed in search results or on your channel.So only those who know the broadcasting address can watch the stream.
- Privete:
The streaming won’t appear on your channel or search results and will be invisible to other users.
- DVR feature allows viewing audience to pause, rewind, and play from any point in the event up to 4 hours before the actual live streaming.If you would like to enable this feature, check [Enable DVR].
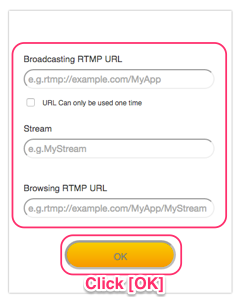
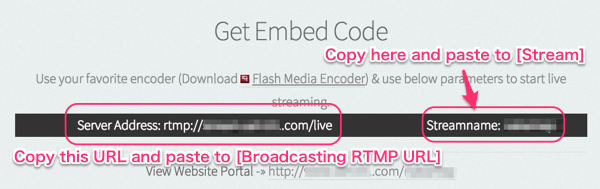
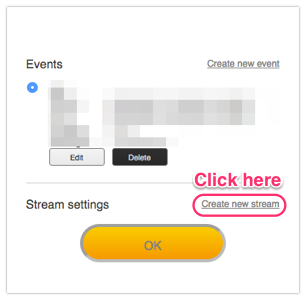
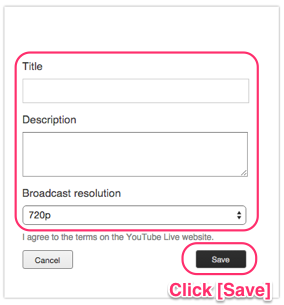
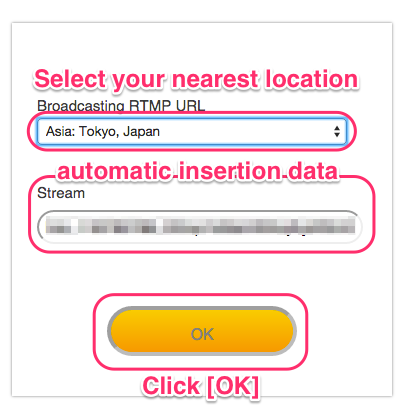
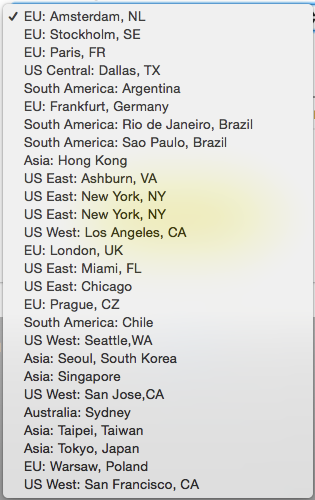
- Click [Create new stream] and set resolution.We recommend to use 720p for LiveShell PRO.And click [Save].
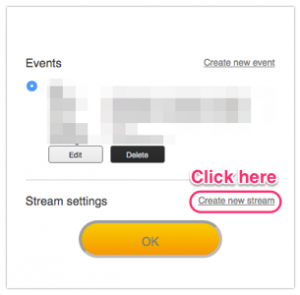

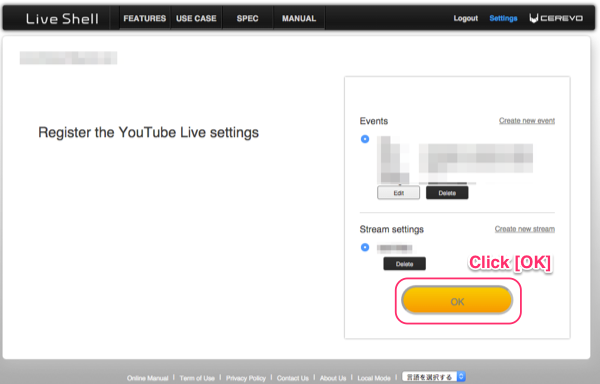
- Click [OK] button If you already set both event and stream.

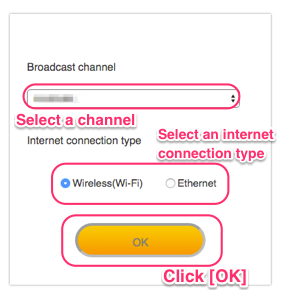
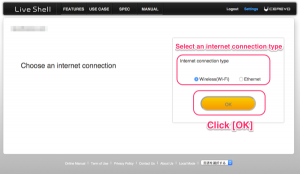
- Select an internet connection type.
- Proceed to step 2-2.After finish set up in 2-3, and then see 5-7 step 12 or later about Dashbaord operation to start live streaming.