Add the ethernet network setting
When adding a new network to the device follow these steps.
Set up steps
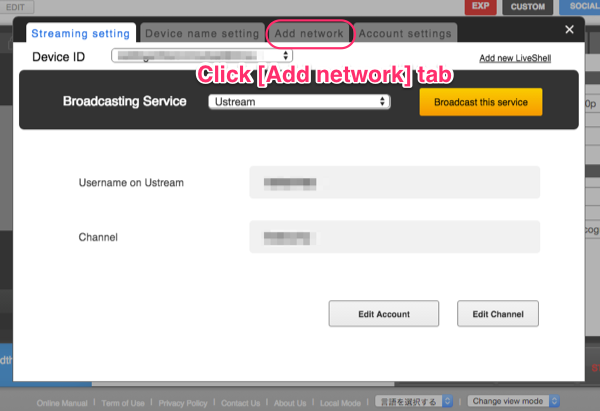
- Click [Settings] button at the right-top of the main panel in Dashboard.

- Select the [Add network] tab.

- If you add Wi-Fi network, Click [Wireless(Wi-Fi)] from left side menus and enter new ESSID and passphrase.Then click [OK] button.

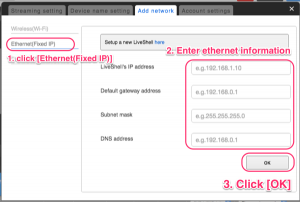
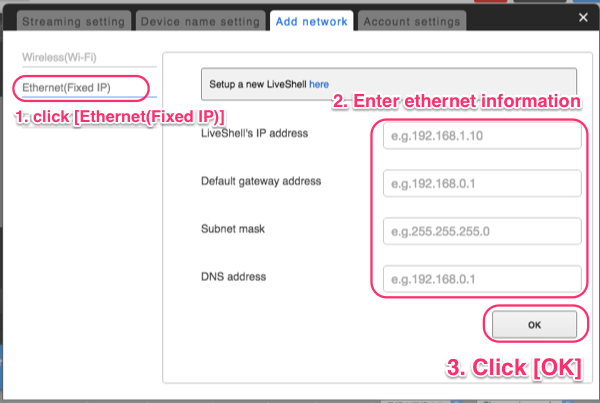
- If you add Static IP ehternet network, Click [Ethernet(Fixed IP)] from left side menus and enter new ehternet network information.Then click [OK] button.
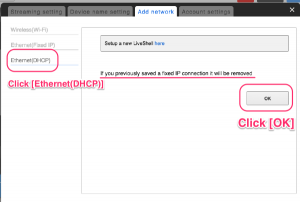
- If you add DHCP ethernet network, Click [Ethernet(DHCP)] from left side menus and click [OK] button.Be careful your static IP ethernet network setting will delete If your click [OK].
- Connect the cables as shown, and press the play button.

- If [LIVE] is displayed in the upper body LCD screen, Livestreaming has been started.


Note : Adding ethernet network(DHCP)
If the new network being added can acquire the IP address through the DHCP server, a new configuration does not need to be added.
*1 Once the Ethernet cable is connect, the LiveShell can be used.
*1 If the LiveShell is configured with a static IP address, the configuration should be changed to allow for a DHCP enabled network.
*1 If the LiveShell is configured with a static IP address, the configuration should be changed to allow for a DHCP enabled network.
Note : Adding Wi-Fi network setting
The most recently used setting is assigned the lowest number on the list (Wi-Fi No.). If the LiveShell discovers multiple wireless APs, it will use the most recent setting, thereby making the older setting a lower priority.
- The 10 most recently saved network settings can be stored at any given time.
If you cannot find the wireless AP, the LiveShell will use the most recently assigned setting (the lowest number setting).
The LiveShell cannot discover a stealth ESSID wireless AP, if one is being used, the access point need to be adjusted.
