- Access http://shell.cerevo.com/login and sign in to Dashboard.
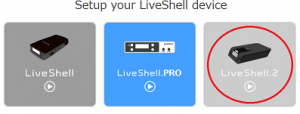
- Select “LiveShell 2” from the device list.
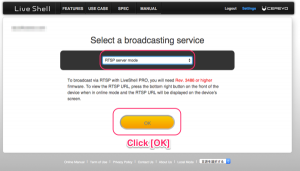
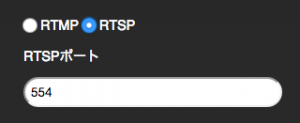
- Select [RTSP] and click [OK] button.
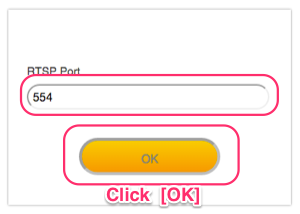
- Set the port number that RTSP streaming will use, the default value is 554.
- Select an internet connection type.
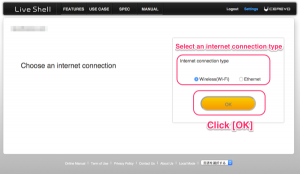
- Proceed to step 2-2.
LiveShell 2
2-1d. RTSP server (initial setup)


2-1e. YouTube Live for live events (initial setup)
Due to a glitch in YouTube Live’s API, we are unable to stream live in the normal flow.
If you are unable to stream live via YouTube Live, please try using RTMP.
If you are unable to stream live via YouTube Live, please try using RTMP.
– How to stream live using RTMP URL
We are checking to resolve the issue and will inform you as soon as the situation improves.
To live stream via YouTube Live with LiveShell 2
You will first need to create YouTube (Google) account complete the confirmation procedures on the YouTube web site.
As of March 2016 there are two way to live stream with YouTube Live, [Stream now] and [Events]. The [YouTube Live] preset menu in Dashboard is for live streaming using [Events]. If you would like to use [Stream now], you will need to select [Other broadcasting services] from the setup menu and enter server information, see section 2-1c for more details.
To Register for YouTube Live Streaming
- Create your channel and verify your account.
- Use a phone number not verified with other YouTube accounts twice or more within a year.
- Confirm that your channel is in good standing*.
*See [Keep your YouTube account in good standing] for more information (external web page).
Note : We are unable to offer any help regarding your YouTube account, please visit the YouTube help forum if you are having problems (external web page).
Setup steps
- Access http://shell.cerevo.com/login and sign in to Dashboard.
- Select [LiveShell 2] from the device list.
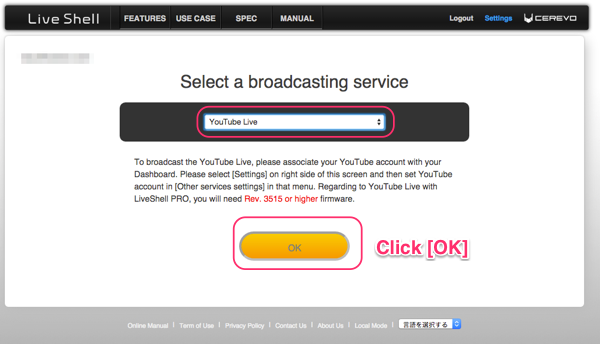
- Select [YouTube Live] and click the [OK] button.

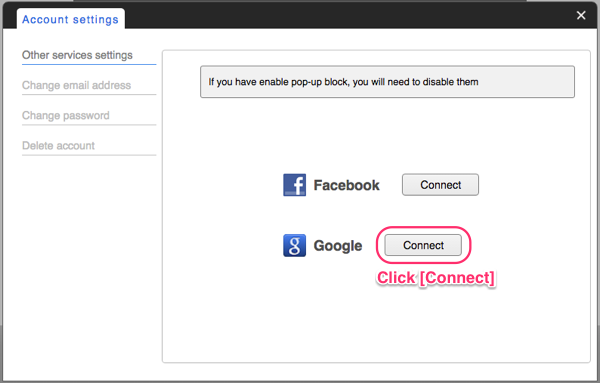
- If you login to Dashboard with a Cerevo account or Facebook account you will need to authorize your Google account to access Dashboard. Press the [Connect] button and proceed with Google Authentication. Once complete, re-select [YouTube Live] and click the [OK] button.

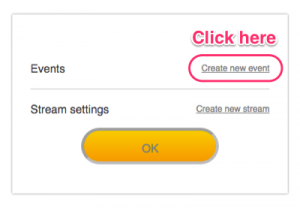
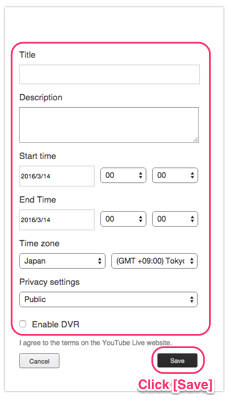
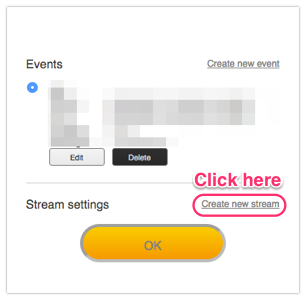
- Click [Create new event] and enter event information.
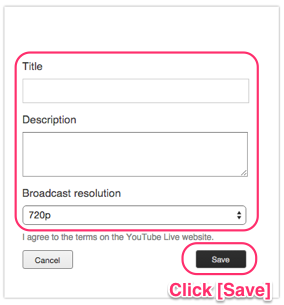
- You can set these basic items from Dashboard, advanced settings can be set on the [Events] page in YouTube. Click the [Save] button to continue.
- Click [Create new stream], set the resolution and click [Save].
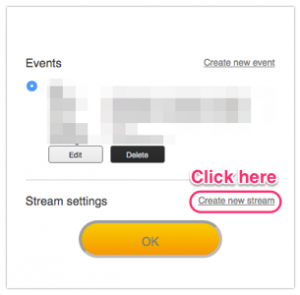

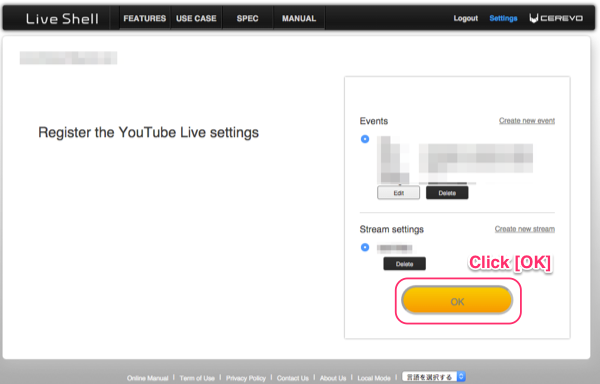
- Click the [OK] button after setting both event and stream information.

- Select an internet connection type.
- Proceed to step 2-2.

2-1f. Facebook Live (initial setup)
- Access http://shell.cerevo.com/login and sign in to Dashboard.
- Select “LiveShell 2” from the device list.
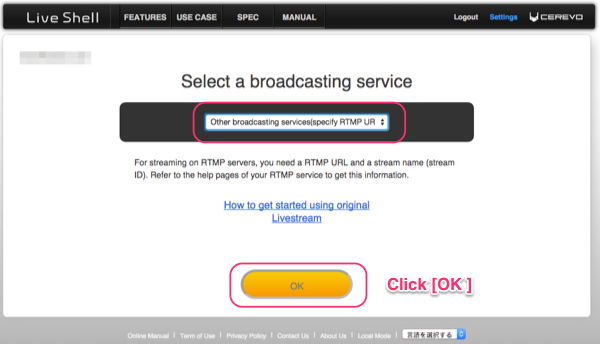
- Select [Other broadcasting services] and click [OK].

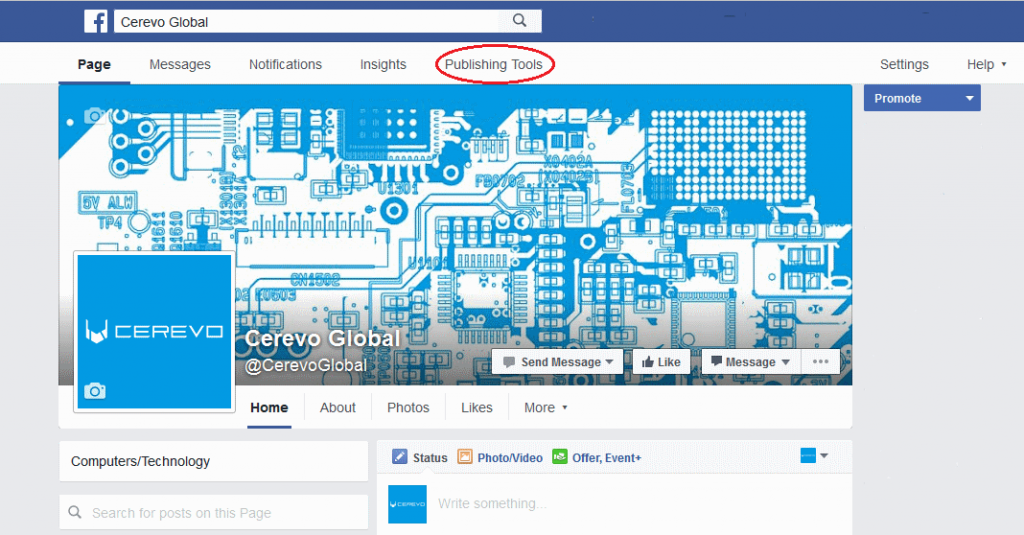
- Open a browser window, login to your Facebook account, go to your managed page and click on [Publishing Tools] in the page controls menu.
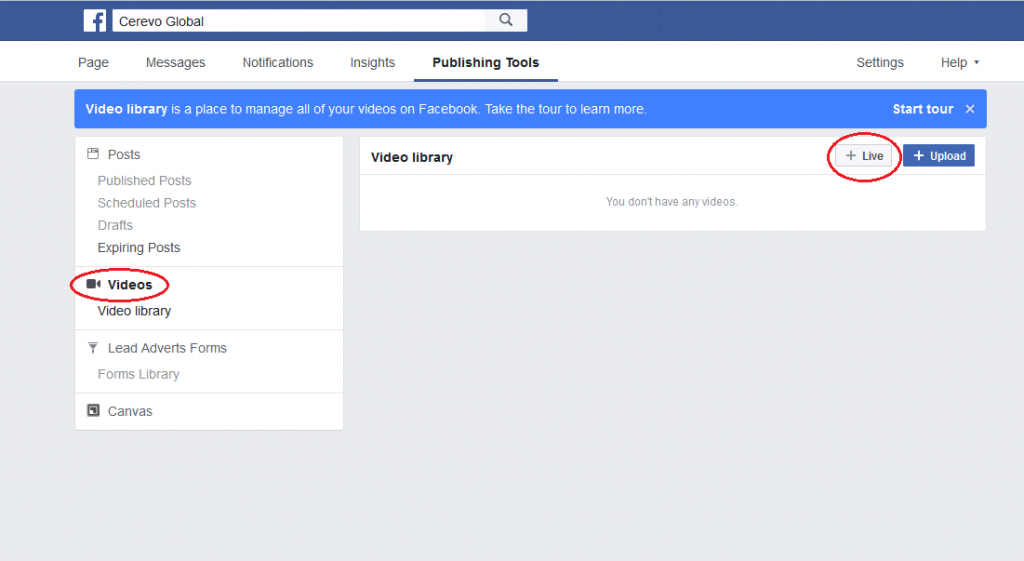
- On the publishing tools screen click [Videos] on the left hand menu then click the [+Live] button.
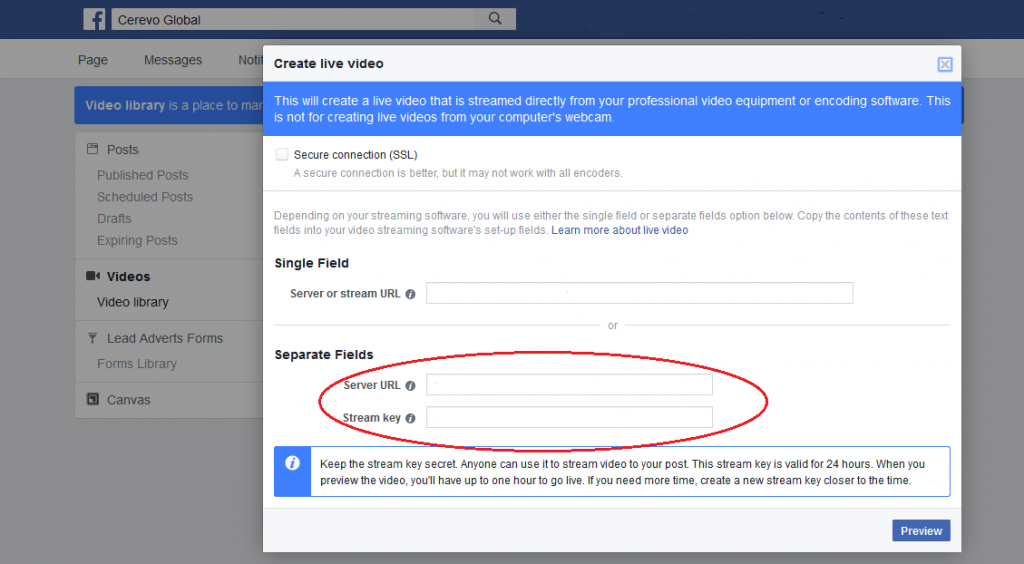
- On the Create live video window, make a note or copy the [Server URL] and [Stream key] fields.
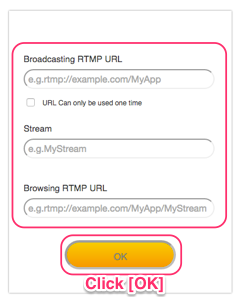
- Return to LiveShell Dashboard and enter the RTMP server information from Facebook as follows –
Server URL>Broadcasting RTMP URL
Stream key>Stream
Leave [Browsing RTMP URL] blank, then click the [OK] button.
- Select an internet connection type and proceed to step 2-2.

2-1g. Twitch (initial setup)
Currently, due to a specification change on the platform side, only live-streaming via RTMP URLs, etc. is possible.
We will inform you of the normal live-streaming method as soon as it is available.
▶︎How to live-streaming at RTMP URLs
We will inform you of the normal live-streaming method as soon as it is available.
▶︎How to live-streaming at RTMP URLs
Please complete user registration on Twitch before proceeding with these steps.
- Access http://shell.cerevo.com/login and sign in to Dashboard.
- Open another browser window or tab and log in to Twitch.
- Select [LiveShell 2] from the device list.
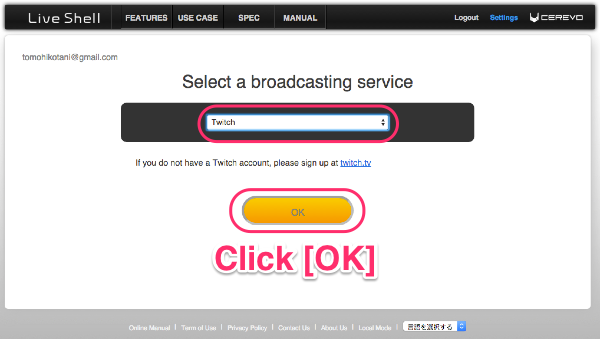
- Select [Twitch].

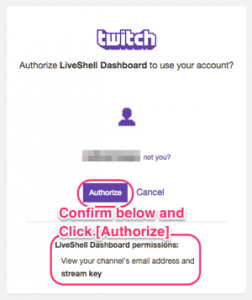
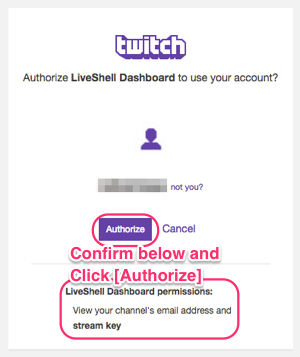
- You will see a pop-up window asking you to authorize Dashboard to use your Twitch account, click the [Authorize] button.
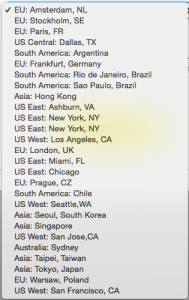
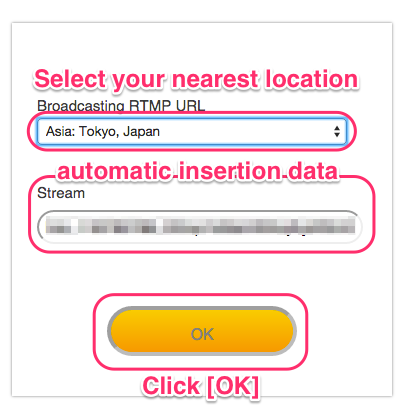
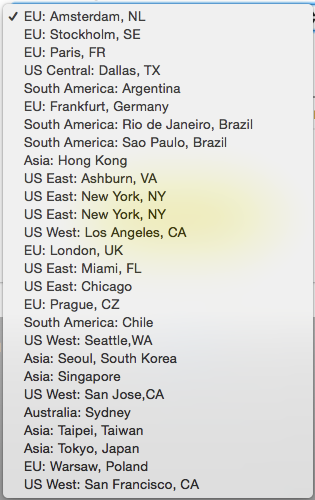
- Dashboard will automatically insert streming information (Stream), you need to change the [Broadcasting RTMP URL] to your nearest location.

- Select an internet connection type.
- Proceed to step 2-2.
- After completing section 2-3. Network settings, you will see the Dashboard main panel, however due to Twitch restrictions you cannot see a preview on your Dashboard. Bitrate, resolution and all other settings can still be controlled via Dashboard. To see a preview, please go to the Twitch Dashboard (https://www.twitch.tv/dashboard).
2-2. Cable connection and power on
- Insert the AC adapter cable into the AC port located on the back of the LiveShell 2 device.
- Connect your video camera/device via a HDMI cable.
- Ethernet: Connect the ethernet cable.
- Wi-Fi: Make sure that the USB WiFi adapter is connected.
- Press and hold the power button for five seconds to power on.
- Select the language using the arrow buttons to scroll through the choices. Press the top right button to confirm your selection.
- Proceed to Ethernet Set Up or Wi-Fi Set Up.
2-3a. Ethernet setup
- Follow the setup instructions in Dashboard.
- Check the PIN displayed in the unit’s LCD.
- Enter the PIN in Dashboard and click the [OK] button.

- The LCD will display [LIVE] and the Dashboard main panel will be displayed on your PC (or other device) when setup is complete.
* For niconico Live you need to setup in niconico web site, please refer to niconico web page [Stream Live on Niconico!].
* For RTSP server mode, please refer to the RTSP server setup.
2-3b. Wi-Fi set up
- Follow the setup instructions in Dashboard.
- You will see the message on the unit’s LCD [Register me at s.cerevo.com.]
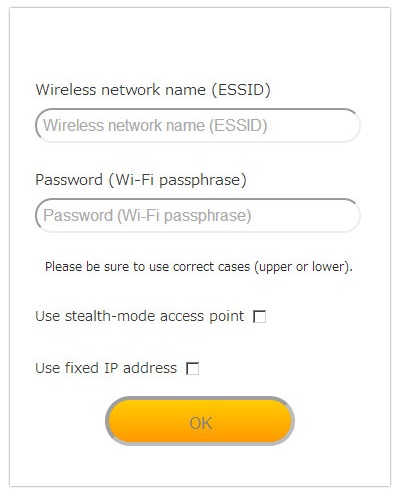
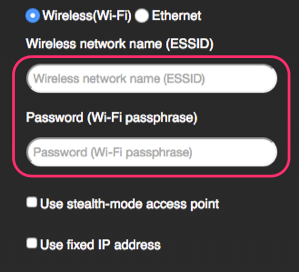
- Enter your Wi-Fi ESSID and Wi-Fi passphrase.
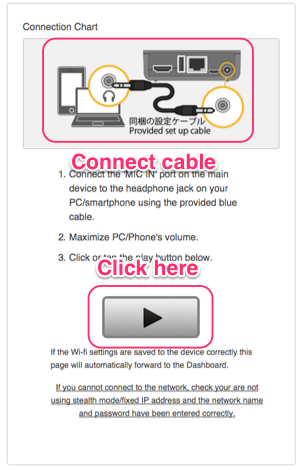
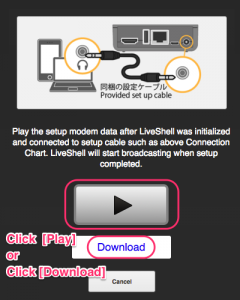
- Connect one end of the included setup cable to the [SET UP] port on the LiveShell 2 and connect the other end to the headphone jack of your device as depicted in the image below. Click the [Play] button.

- The LCD will display [LIVE] and you will be able to see the Dashboard main panel on your PC (or other device) when setup is complete.
* For niconico Live you need to setup via the niconico web site, please refer to external web page [Stream Live on Niconico!].
* For RTSP server mode, please refer to the RTSP server setup.
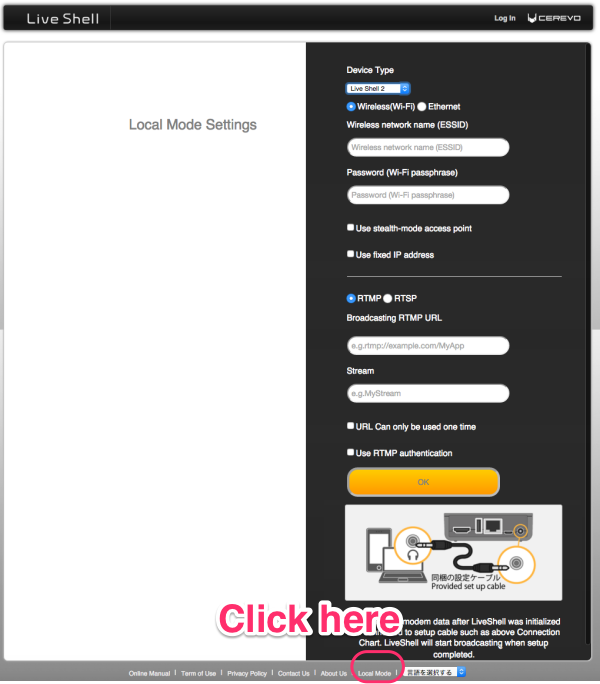
2-4. Local Mode
[Local Mode] allows you to stream video and audio directly to a RTMP server or RTSP client without connecting to Dashboard. Use local mode if you wish to stream to a closed network for security or connection reasons.
- Access https://shell.cerevo.com/local and you will see this page.

- Select [Device Type] as [LiveShell 2].
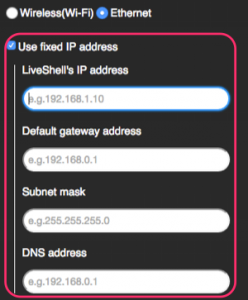
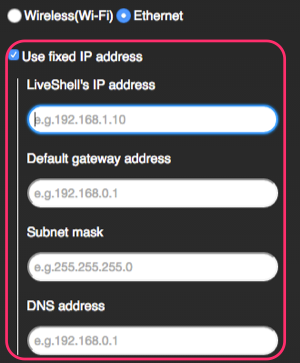
- Select an internet connection type (Wi-Fi or Ethernet) and enter network settings. You can use a fixed IP address in both Wi-Fi and Ethernet mode.
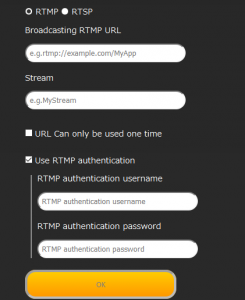
- Select streaming type (RTMP or RTSP) and enter server settings. You can also optionally set RTMP authentication settings and a one time broadcasting URL.
- Click [OK], connect the setup cable and follow the on screen setup instructions.
- If you have any trouble transferring setup data, check the PC (or other device) is correctly connected to the LiveShell 2 using the included setup cable and the volume of your PC is set to maximum.
You can also download the setup data as an audio file. To use the setup audio file, click the [Download] link and connect your PC to the LiveShell 2 with the setup cable, then play the file using audio player or other compatible application. - When the setup data transfer is complete, LiveShell 2 will connect to the specified RTMP server or wait for a RTSP client connection and start broadcasting.


3. Display
3-1. Information on Dashboard
*The following example shows using Ustream to stream, other streaming services may have different Dashboard options.
Top

- Ustream account icon
- Ustream user name
- ESSID which the LiveShell 2 is connected to or Ethernet
- Installed firmware revision
- Dashboard registered email address
- The Device ID (displayed when 2 or more devices are registered to a single Dashboard account)
- The Ustream name entered into the LiveShell 2
- Broadcasting show title
Left side

- 9. Battery status, input resolution, key lock indictor, caption indicator, pause, crop, and recording status.
- 10. Ustream player: Selecting this area will open the Ustream video page.
In the event of an error, the display will read: “[Currently not online].” - 11. Connection status
Excellent No action required Good No action required Warning The bit-rate or frame-rate settings need to be adjusted Emergency The internet connection speed is slower than the current broadcast setting.
The bit-rate or frame-rate settings need to be adjusted immediately.Dead Video has been cut off. Adjust settings immediately. ・・・ Offline or no-response from LiveShell 2 - 12. Total time from the start of broadcasting
- 13. Current viewer/total viewers
- 14. Current video and audio bitrate
- 15. Current video frame-rate
